Self Hosting Is Hard - 17-01-2026
Or is it?
Here's a quick rundown of the things needed:
- Dokploy
- VPS
- Domain Name
- Cloudflare Account
What are they for:
Dokploy
This holy grail of a tool is a godsend for anyone thinking of self-hosting on the cloud. You can think of it as a graphical user interface (GUI) layer to manage your services such as databases and websites. Yes, I meant them in plural. You can host multiple services all on a single Dokploy.
Think of all the syntax and commands needed to perform certain actions such as setting domain and subdomain for your services, for example mapping mysubdomain.coolwebsite.com. With a click of a button, an input field where you enter the name you want to use for your subdomain (in this case, that would be mysubdomain.coolwebsite.com) plus securing it with a certificate (those https you see in front of a website instead of http) would be done for you.
VPS
The 'cloud' that kept getting mentioned in the past decade by small and large businesses basically meant instead of running their services on a specialized computer on-premise, they rent out a computer, with an operating system (OS), a virtual CPU, RAM, and storage space of their choosing that runs on a remote location. Of course, there are different layers of abstraction that all describe running on cloud. Some of them like Amazon Web Service (AWS) offers specialized tools that serve specialized needs, all with different usage pricing.
Virtual Private Server (VPS) is one of the lowest layer of abstraction of the 'cloud' and as the name suggests, you and you alone are responsible for managing the entirety of your own (private) server. Fortunately, as I have mentioned earlier, Dokploy simplifies the managing of server part.
Domain Name
This is perhaps the simplest term to understand. A domain name is the name of your website. You need to 'buy' them from a domain registrar. When you rent a VPS, you are given an IP address. You do not want others to access your services through your IP address for several reasons which I will not go into here. Instead, you want visitor to know your service by the domain name you provide to them.
Cloudflare Account
The cheapest and quickest way to add basic protection to your website is with Cloudflare Domain Name System (DNS). There are a lot more benefits to having a Cloudflare account which I won't get into. One other thing to note is that Cloudflare is also a domain registrar. As long as you are not looking to get a country-specific domain such as coolwebsite.my, buying directly from Cloudflare is considered one of the cheapest option.
Step-by-step guide:
1. Register an account with Cloudflare
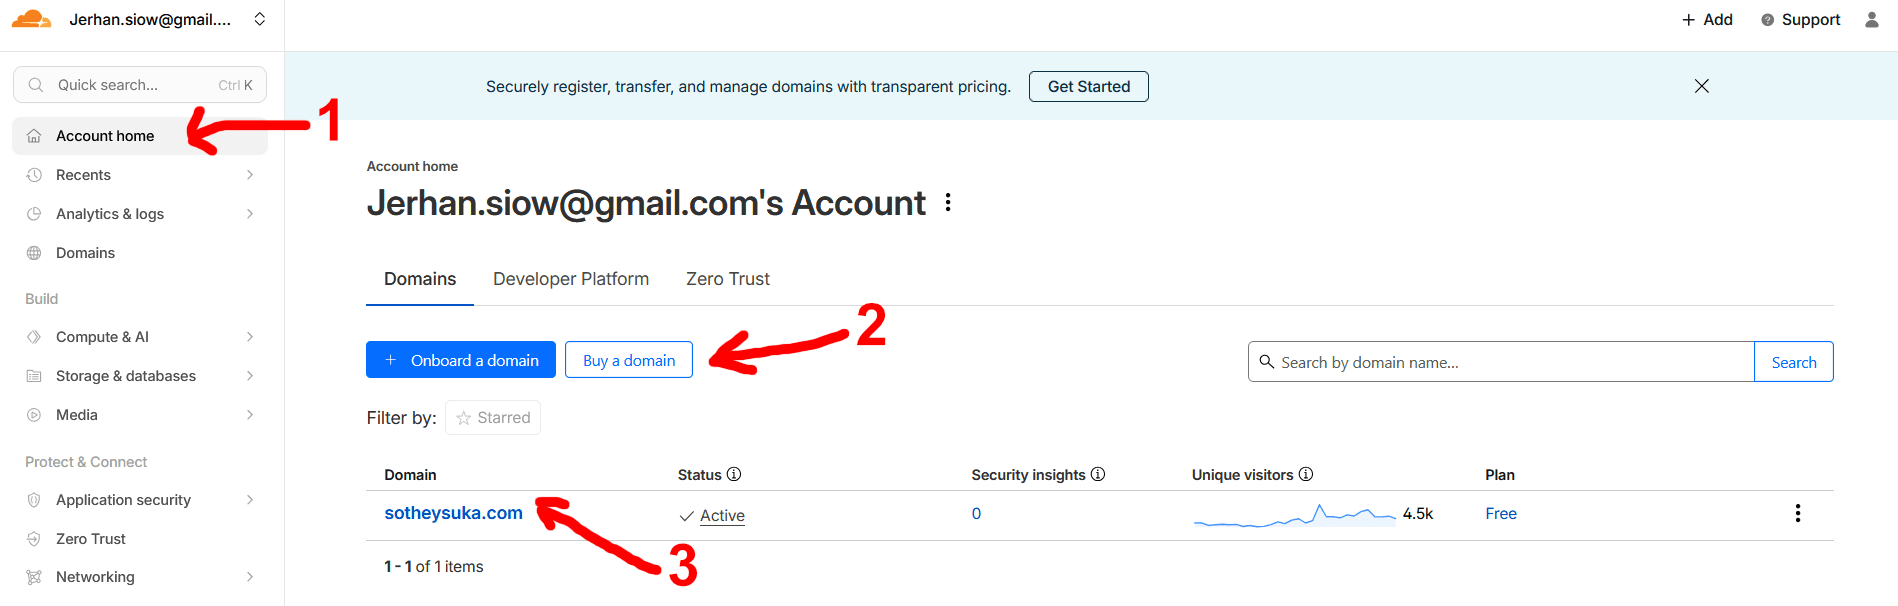
This step should be self-explanatory. One you are in, go to Account home if you are not there (1)
You should see the option to onboard a domain or buy a domain (2). If you plan to buy your domain from another registrar. Click the Onboard a domain button and there should be a fairly obvious input field that asks for your domain name, then 2 Name Server (NS) will be given to you which you have to copy and paste both into your domain registrar's dashboard. What this does is that when a user visits your website for example, Cloudflare would pick that website name up, and find out where your cloud is so that it retrieves and returns the content from your cloud.
If not, then no configuration of Name Server (NS) will be necessary. All the domain you onboarded/bought through Cloudflare will show up in (3). Note: you can have multiple domain in a single Cloudflare account, but you need to configure the security for each of the domains individually.
2. Rent a VPS
This is the one step I could not show or guide with. Because there are so many providers out there. And I could not be biased towards any provider which is why I encourage you to search for one online and rent it.
One important advice I would give is to pick an operating system (OS) from Linux distribution. This could be Debian, Ubuntu or any other options that is available from the cloud/VPS provider. Generally speaking, at least one Linux distribution will be available as the operating system (OS) is free to install and use.
Take note of the IP address of your VPS. You will need it later.
It is also at this step that you should set up your SSH keys to access your VPS. This is a much more secure way to access your VPS than using a password. If you are not sure how to do this, please search for a tutorial online. I would recommend using the command line to generate your SSH keys and copy the public key to your VPS. This is a very common practice and you will find plenty of tutorials online.
And also, your cloud/VPS provider should have the option for you to configure the firewall to secure your VPS.
What you have to do here is to keep port 80, 443 and 3000 open and have the rest closed.
3. Install Dokploy
This is another straightforward step. You can click the link below and follow the official installation guide:
Dokploy Installation Guide From Their Official Documentation
Alternatively, I have them summarized here:
Step 1: In your cloud/VPS provider, there should be an option to access your VPS via a console. The console will look similar to your Windows/Macbook terminal.
Step 2: Run the script from Dokploy installation guide:
curl -sSL https://dokploy.com/install.sh | shStep 3: Open your browser and navigate to:
http://your-ip-from-your-vps:3000Step 4: Create your admin account.
4. System Hardening
Click your domain in (3) and you will see the sidebar options change to this:
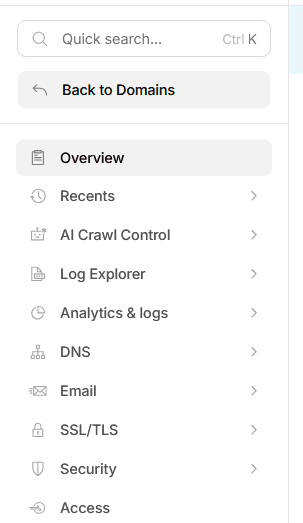
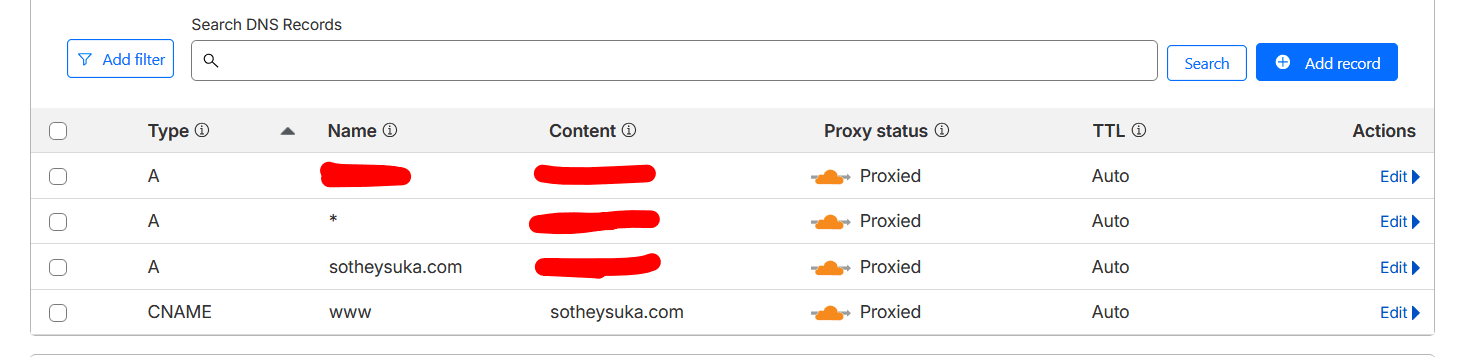
Click on the DNS option, then select Records. Set them by clicking the Add record button over on the right side. Make sure the Content for A records are pointing to your VPS IP address. As for the name, having the wildcard (*) will be helpful. And you can set another A record to use as subdomain for Dokploy. It can be anything such as mydokploy.coolwebsite.com.
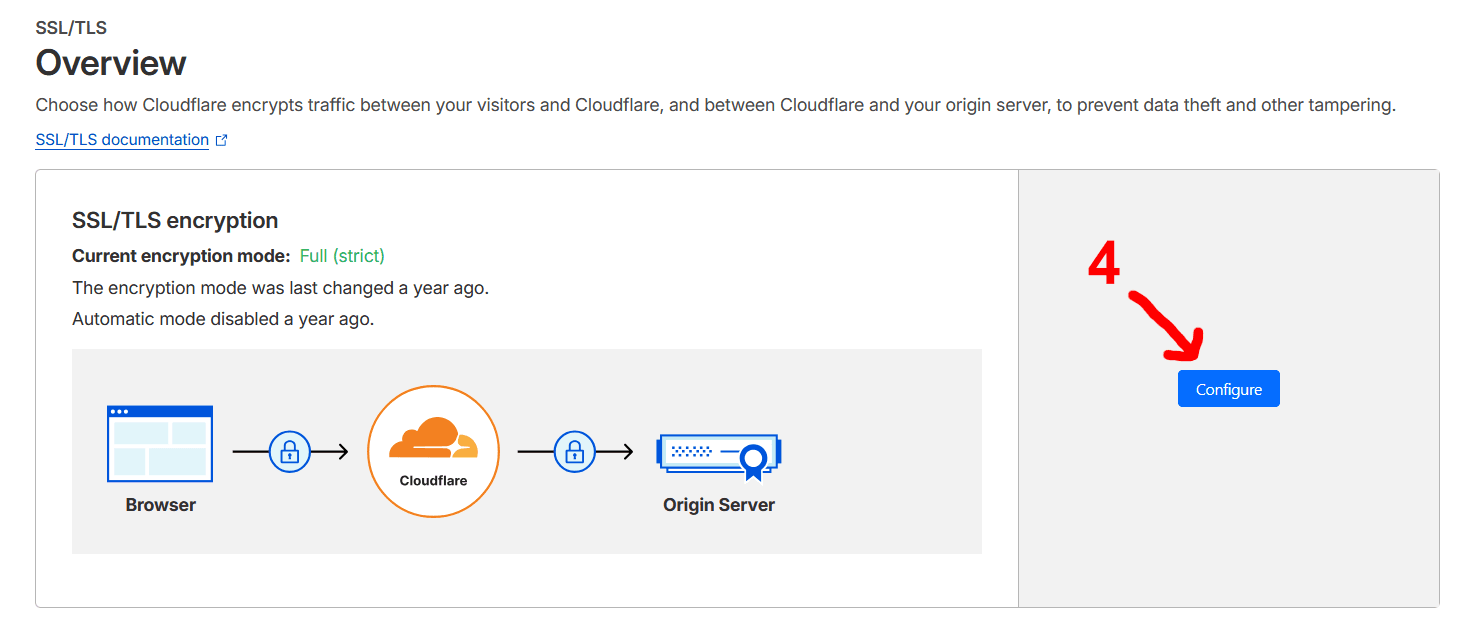
Once you are done, go to the sidebar again and select SSL/TLS option, then select Overview. Click the configure button as shown in (4), and set it to Custom SSL/TLS and select Full (Strict):
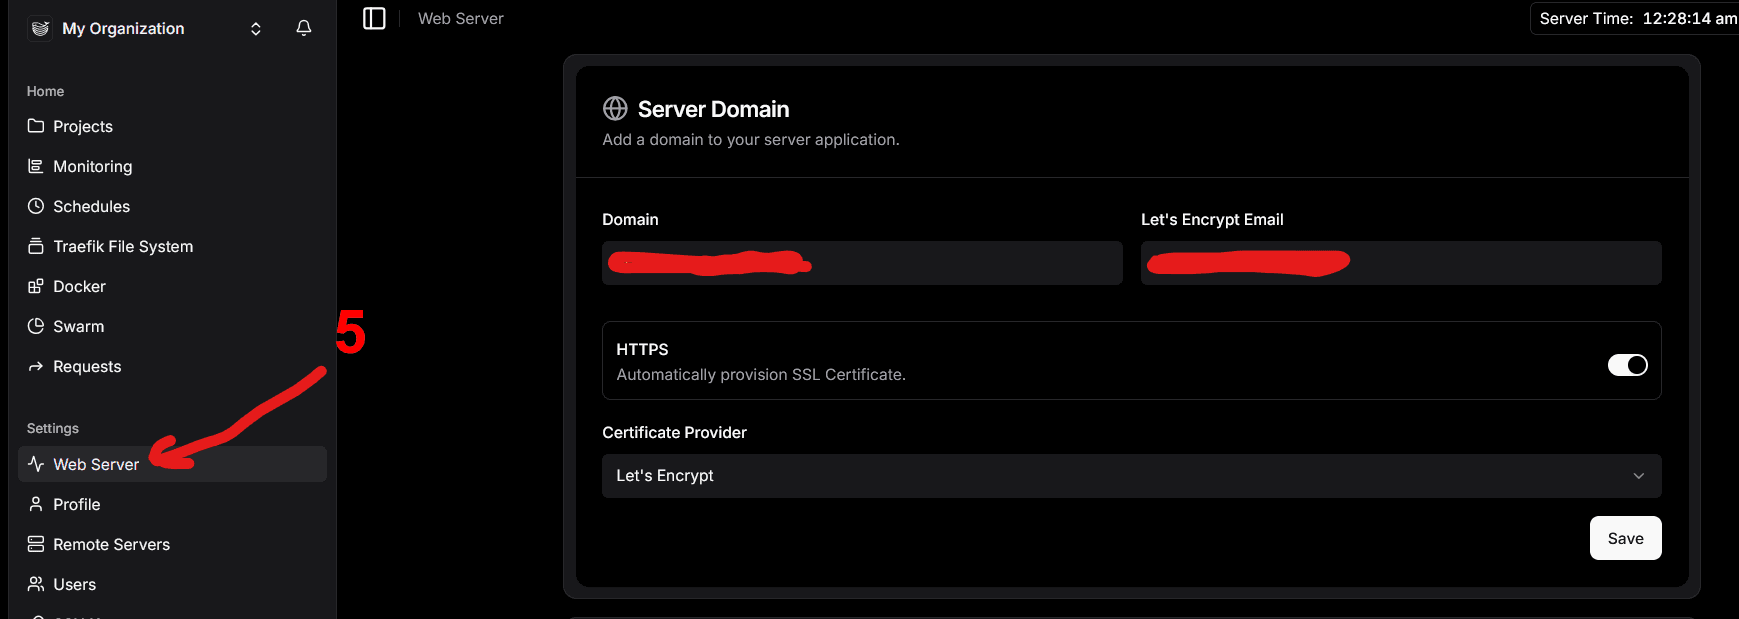
Now you can go back to your Dokploy instance
http://your-ip-from-your-vps:3000And configure your web server (5) to point to the domain you set in Cloudflare, for example: mydokploy.coolwebsite.com. Make sure to turn on HTTPS and add a Certificate Provider such as Let's Encrypt. This will automatically provision a certificate for your domain.
Finally, you can now disable public access to your IP address by running this command on your VPS console:
docker service update --publish-rm "published=3000,target=3000,mode=host" dokployConclusion
Although there are a lot of details that I skipped, they can be further explored by other experts in YouTube or written guides, such as adding your website with Docker and building the image with as little friction as possible.
Ultimately, the aim of this guide is to help me retrace the steps taken if one day I were to forgot how to self-host this website.